使用Koa2从零开始实现一个具备基本功能的后端服务器
hai-27 2020-03-15
Node
Koa
# 前言
使用Koa2实现了一个node.js后端服务器快速启动模板(即具备后端服务器的基本功能),使用了路由、数据库连接、请求体处理、异常处理、静态资源请求处理、session、登录拦截器等中间件,基本实现了一个node.js后端服务器的基本功能。并设计实现了用户模块的登录、注册、查找用户名接口。
之前基于Node.js(Koa) 实现了vue-store项目后端store-server。昨晚我突然想到,可以从那个后端服务器把关键部分抽离出来实现一个后端服务器快速启动模板,需要使用的时候只需要分模块的添加一些接口并实现,就可以快速的构建起来一个后端服务器。
# 快速创建一个服务器
# 安装koa
npm install koa -S
1
# 基本配置
const Koa = require('koa');

let { Port } = require('./config');

let app = new Koa();

// response
app.use(ctx => {
  ctx.body = 'Hello Koa';
});

// 监听服务器启动端口
app.listen(Port, () => {
  console.log(`服务器启动在${ Port }端口`);
});
1
2
3
4
5
6
7
8
9
10
11
12
13
14
15
2
3
4
5
6
7
8
9
10
11
12
13
14
15
# 测试
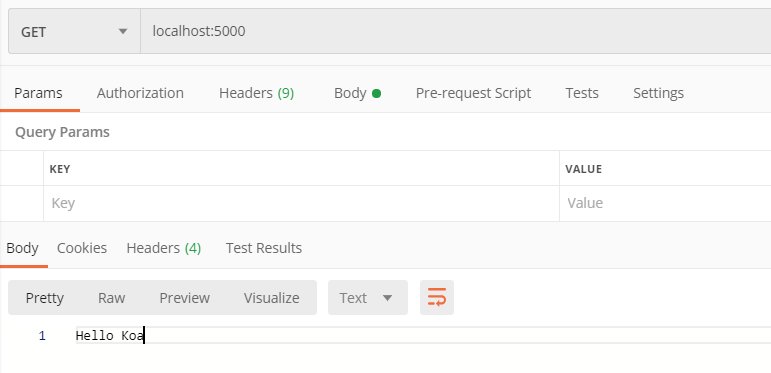
就这样一个node.js服务器就启动起来了,

使用postman测试一下

# 路由中间件
思路:
- 使用koa-router中间件处理路由;
- 如果把所有的路由写在一起,将会非常拥挤,不利于后期维护,所以为每个业务模块配置模块子路由;
- 然后把所有的模块子路由汇总到
./src/roters/index.js; - 再在入口文件
require('./routers')。
# 路由中间件目录
└── src # 源代码目录
    └── routers # 路由目录
        └── router # 子路由目录
            ├── usersRouter.js # 用户模块子路由
            ├── ... # 更多的模块子路由
        ├── index.js # 路由入口文件
1
2
3
4
5
6
2
3
4
5
6
# 安装koa-router
npm install koa-router -S
1
# 模块子路由设计
const Router = require('koa-router');
// 导入控制层
const usersController = require('../../controllers/usersController');

let usersRouter = new Router();

usersRouter
  .post('/users/login', usersController.Login)

module.exports = usersRouter;
1
2
3
4
5
6
7
8
9
10
2
3
4
5
6
7
8
9
10
# 模块子路由汇总
const Router = require('koa-router');

let Routers = new Router();

const usersRouter = require('./router/usersRouter');

Routers.use(usersRouter.routes());

module.exports = Routers;
1
2
3
4
5
6
7
8
9
2
3
4
5
6
7
8
9
# 使用路由中间件
// 使用路由中间件
const Routers = require('./routers');
app.use(Routers.routes()).use(Routers.allowedMethods());
1
2
3
2
3
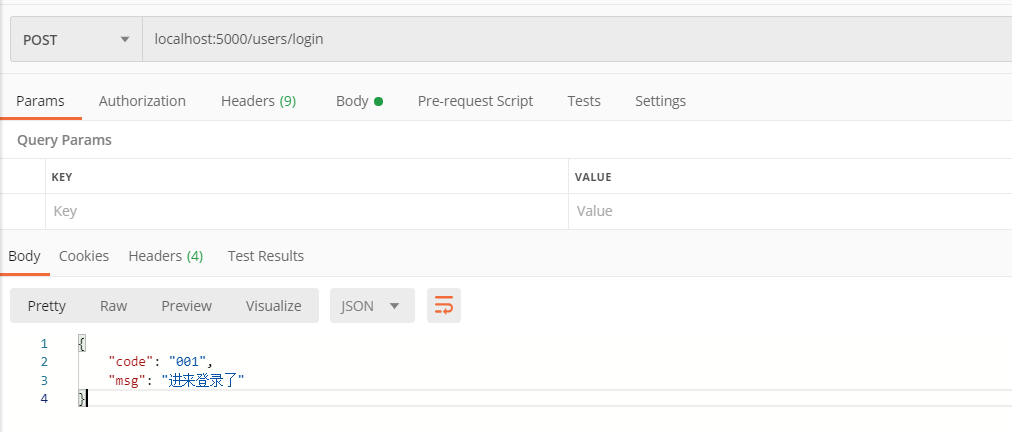
# 接口测试
使用postman测试接口localhost:5000/users/login

# 数据库连接封装
思路:
- 后端与数据库的交互是非常频繁的,如果是一个接一个地创建和管理连接,将会非常麻烦;
- 所以使用连接池的方式,封装一个连接池模块;
- 对连接进行集中的管理(取出连接,释放连接);
- 执行查询使用的是connection.query(),对connection.query()进行二次封装,统一处理异常;
- 向外导出一个db.query()对象,使用的时候,只需要传入sql语句、查询参数即可,例如:
db.query('select * from users where userName = ? and password = ?', ['userName', 'password'])
1
# 安装mysql依赖包
npm install mysql -S
1
# 配置连接选项
在config.js添加如下代码,然后在db.js引入
// 数据库连接设置
dbConfig: {
  connectionLimit: 10,
  host: 'localhost',
  user: 'root',
  password: '',
  database: 'storeDB'
}
1
2
3
4
5
6
7
8
2
3
4
5
6
7
8
# 连接池封装
创建"./src/models/db.js"
var mysql = require('mysql');
const { dbConfig } = require('../config.js');
var pool = mysql.createPool(dbConfig);

var db = {};

db.query = function (sql, params) {

  return new Promise((resolve, reject) => {
    // 取出连接
    pool.getConnection(function (err, connection) {

      if (err) {
        reject(err);
        return;
      }

      connection.query(sql, params, function (error, results, fields) {
        console.log(`${ sql }=>${ params }`);
        // 释放连接
        connection.release();
        if (error) {
          reject(error);
          return;
        }
        resolve(results);
      });

    });
  });
}
// 导出对象
module.exports = db;
1
2
3
4
5
6
7
8
9
10
11
12
13
14
15
16
17
18
19
20
21
22
23
24
25
26
27
28
29
30
31
32
33
2
3
4
5
6
7
8
9
10
11
12
13
14
15
16
17
18
19
20
21
22
23
24
25
26
27
28
29
30
31
32
33
更多的信息请参考mysql文档。
# 请求体数据处理
思路:
- 使用koa-body中间件,可以很方便的处理请求体的数据,例如
let { userName, password } = ctx.request.body;
1
# 安装koa-body中间件
npm install koa-body -S
1
# 使用koa-body中间件
在config.js配置上传文件路径
uploadDir: path.join(__dirname, path.resolve('../public/')), // 上传文件路径
1
在app.js使用koa-body中间件
const KoaBody = require('koa-body');
let { uploadDir } = require('./config');
1
2
2
// 处理请求体数据
app.use(KoaBody({
  multipart: true,
  // parsedMethods默认是['POST', 'PUT', 'PATCH']
  parsedMethods: ['POST', 'PUT', 'PATCH', 'GET', 'HEAD', 'DELETE'],
  formidable: {
    uploadDir: uploadDir, // 设置文件上传目录
    keepExtensions: true, // 保持文件的后缀
    maxFieldsSize: 2 * 1024 * 1024, // 文件上传大小限制
    onFileBegin: (name, file) => { // 文件上传前的设置
      // console.log(`name: ${name}`);
      // console.log(file);
    }
  }
}));
1
2
3
4
5
6
7
8
9
10
11
12
13
14
15
2
3
4
5
6
7
8
9
10
11
12
13
14
15
# 异常处理
思路:
- 程序在执行的过程中难免会出现异常;
- 如果因为一个异常服务器就挂掉,那会大大增加服务器的维护成本,而且体验极差;
- 所以在中间件的执行前进行一次异常处理。
在app.js添加如下代码
// 异常处理中间件
app.use(async (ctx, next) => {
  try {
    await next();
  } catch (error) {
    console.log(error);
    ctx.body = {
      code: '500',
      msg: '服务器未知错误'
    }
  }
});
1
2
3
4
5
6
7
8
9
10
11
12
2
3
4
5
6
7
8
9
10
11
12
# 静态资源服务器
思路:
- 前端需要大量的静态资源,后端不可能为每条静态资源的请求都写一份代码;
- koa-static可以非常方便的实现一个静态资源服务器;
- 只需要创建一个文件夹统一放静态资源,例如
./public; - 那么就可以通过
http://localhost:5000/public/文件夹/文件名直接访问。
# 安装koa-static中间件
npm install koa-static -S
1
# 使用koa-static中间件
在config.js配置静态资源路径
staticDir: path.resolve('../public'), // 静态资源路径
1
在app.js使用koa-static中间件
const KoaStatic = require('koa-static');
let { staticDir } = require('./config');
1
2
2
// 为静态资源请求重写url
app.use(async (ctx, next) => {
  if (ctx.url.startsWith('/public')) {
    ctx.url = ctx.url.replace('/public', '');
  }
  await next();
});
// 使用koa-static处理静态资源
app.use(KoaStatic(staticDir));
1
2
3
4
5
6
7
8
9
2
3
4
5
6
7
8
9
# 接口测试
使用浏览器测试接口http://localhost:5000/public/imgs/a.png

# session实现
思路:
- 使用koa-session中间件实现session的操作;
- 用于登录状态的管理;
- 本例子使用内存存储的方案,适用于session数据量小的场景;
- 如果session数据量大,建议使用外部存储介质存放session数据 。
# 安装koa-session中间件
npm install koa-session -S
1
# 使用koa-session中间件
创建"./src/middleware/session.js"
let store = {
  storage: {},
  set (key, session) {
    this.storage[key] = session;
  },
  get (key) {
    return this.storage[key];
  },
  destroy (key) {
    delete this.storage[key];
  }
}
let CONFIG = {
  key: 'koa:session',
  maxAge: 86400000,
  autoCommit: true, // 自动提交标头(默认为true)
  overwrite: true, // 是否可以覆盖(默认为true
  httpOnly: true, // httpOnly与否(默认为true)
  signed: true, // 是否签名(默认为true)
  rolling: false, // 强制在每个响应上设置会话标识符cookie。到期重置为原始的maxAge,重置到期倒数
  renew: false, // 在会话即将到期时更新会话,因此我们始终可以使用户保持登录状态。(默认为false)
  sameSite: null, // 会话cookie sameSite选项
  store // session池
}

module.exports = CONFIG;
1
2
3
4
5
6
7
8
9
10
11
12
13
14
15
16
17
18
19
20
21
22
23
24
25
26
2
3
4
5
6
7
8
9
10
11
12
13
14
15
16
17
18
19
20
21
22
23
24
25
26
在app.js使用koa-session中间件
const Session = require('koa-session');
// session
const CONFIG = require('./middleware/session');
app.keys = ['session app keys'];
app.use(Session(CONFIG, app));
1
2
3
4
5
2
3
4
5
# 登录拦截器
思路:
- 系统会有一些模块需要用户登录后才能使用的;
- 接口设计是,需要登录的模块api均以
/user/开头; - 那么只需要在全局路由执行前判断api是否以
/user/; - 如果是,则判断是否登录,登录了就放行,否则拦截,直接返回错误信息;
- 如果不是,直接放行。
在"./src/middleware/isLogin.js",创建一个验证是否登录的函数
module.exports = async (ctx, next) => {
  if (ctx.url.startsWith('/user/')) {
    if (!ctx.session.user) {
      ctx.body = {
        code: '401',
        msg: '用户没有登录,请登录后再操作'
      }
      return;
    }
  }
  await next();
};
1
2
3
4
5
6
7
8
9
10
11
12
2
3
4
5
6
7
8
9
10
11
12
在app.js使用登录拦截器
// 判断是否登录
const isLogin = require('./middleware/isLogin');
app.use(isLogin);
1
2
3
2
3
# 分层设计
思路:
- 路由负责流量分发;
- 控制层负责业务逻辑处理,及返回接口json数据;
- 数据持久层负责数据库操作;
- 下面以用户模块的登录、注册、用户名查找接口的实现为例说明。
# 目录结构
└── src # 源代码目录
    └── routers # 路由目录
        └── router # 子路由目录
            ├── usersRouter.js # 用户模块子路由
            ├── ... # 更多的模块子路由
        ├── index.js # 路由入口文件
    └── controllers # 控制层目录
        ├── usersController.js # 用户模块控制层
        ├── ... # 更多的模块控制层
    └── models # 数据持久层目录
        └── dao # 模块数据持久层目录
            ├── usersDao.js # 用户模块数据持久层
            ├── ... # 更多的模块数据持久层
        ├── db.js # 数据库连接函数
    ├── app.js # 入口文件
1
2
3
4
5
6
7
8
9
10
11
12
13
14
15
2
3
4
5
6
7
8
9
10
11
12
13
14
15
# 用户模块接口实现
# 数据库设计
create database storeDB;
use storeDB;
create table users(
  user_id int primary key auto_increment,
  userName char (20) not null unique,
  password char (20) not null,
  userPhoneNumber char(11) null
);
1
2
3
4
5
6
7
8
2
3
4
5
6
7
8
# 路由设计
const Router = require('koa-router');
// 导入控制层
const usersController = require('../../controllers/usersController');

let usersRouter = new Router();

usersRouter
  .post('/users/login', usersController.Login)
  .post('/users/findUserName', usersController.FindUserName)
  .post('/users/register', usersController.Register)

module.exports = usersRouter;
1
2
3
4
5
6
7
8
9
10
11
12
2
3
4
5
6
7
8
9
10
11
12
# 控制层设计
const userDao = require('../models/dao/usersDao');
const { checkUserInfo, checkUserName } = require('../middleware/checkUserInfo');

module.exports = {
  /**
   * 用户登录
   * @param {Object} ctx
   */
  Login: async ctx => {

    let { userName, password } = ctx.request.body;

    // 校验用户信息是否符合规则
    if (!checkUserInfo(ctx, userName, password)) {
      return;
    }

    // 连接数据库根据用户名和密码查询用户信息
    let user = await userDao.Login(userName, password);
    // 结果集长度为0则代表没有该用户
    if (user.length === 0) {
      ctx.body = {
        code: '004',
        msg: '用户名或密码错误'
      }
      return;
    }

    // 数据库设置用户名唯一
    // 结果集长度为1则代表存在该用户
    if (user.length === 1) {

      const loginUser = {
        user_id: user[0].user_id,
        userName: user[0].userName
      };
      // 保存用户信息到session
      ctx.session.user = loginUser;

      ctx.body = {
        code: '001',
        user: loginUser,
        msg: '登录成功'
      }
      return;
    }

    //数据库设置用户名唯一
    //若存在user.length != 1 || user.length!=0
    //返回未知错误
    //正常不会出现
    ctx.body = {
      code: '500',
      msg: '未知错误'
    }
  },
  /**
   * 查询是否存在某个用户名,用于注册时前端校验
   * @param {Object} ctx
   */
  FindUserName: async ctx => {
    let { userName } = ctx.request.body;

    // 校验用户名是否符合规则
    if (!checkUserName(ctx, userName)) {
      return;
    }
    // 连接数据库根据用户名查询用户信息
    let user = await userDao.FindUserName(userName);
    // 结果集长度为0则代表不存在该用户,可以注册
    if (user.length === 0) {
      ctx.body = {
        code: '001',
        msg: '用户名不存在,可以注册'
      }
      return;
    }

    //数据库设置用户名唯一
    //结果集长度为1则代表存在该用户,不可以注册
    if (user.length === 1) {
      ctx.body = {
        code: '004',
        msg: '用户名已经存在,不能注册'
      }
      return;
    }

    //数据库设置用户名唯一,
    //若存在user.length != 1 || user.length!=0
    //返回未知错误
    //正常不会出现
    ctx.body = {
      code: '500',
      msg: '未知错误'
    }
  },
  Register: async ctx => {
    let { userName, password } = ctx.request.body;

    // 校验用户信息是否符合规则
    if (!checkUserInfo(ctx, userName, password)) {
      return;
    }
    // 连接数据库根据用户名查询用户信息
    // 先判断该用户是否存在
    let user = await userDao.FindUserName(userName);

    if (user.length !== 0) {
      ctx.body = {
        code: '004',
        msg: '用户名已经存在,不能注册'
      }
      return;
    }

    try {
      // 连接数据库插入用户信息
      let registerResult = await userDao.Register(userName, password);
      // 操作所影响的记录行数为1,则代表注册成功
      if (registerResult.affectedRows === 1) {
        ctx.body = {
          code: '001',
          msg: '注册成功'
        }
        return;
      }
      // 否则失败
      ctx.body = {
        code: '500',
        msg: '未知错误,注册失败'
      }
    } catch (error) {
      reject(error);
    }
  }
};
1
2
3
4
5
6
7
8
9
10
11
12
13
14
15
16
17
18
19
20
21
22
23
24
25
26
27
28
29
30
31
32
33
34
35
36
37
38
39
40
41
42
43
44
45
46
47
48
49
50
51
52
53
54
55
56
57
58
59
60
61
62
63
64
65
66
67
68
69
70
71
72
73
74
75
76
77
78
79
80
81
82
83
84
85
86
87
88
89
90
91
92
93
94
95
96
97
98
99
100
101
102
103
104
105
106
107
108
109
110
111
112
113
114
115
116
117
118
119
120
121
122
123
124
125
126
127
128
129
130
131
132
133
134
135
136
137
# 数据持久层设计
const db = require('../db.js');

module.exports = {
  // 连接数据库根据用户名和密码查询用户信息
  Login: async (userName, password) => {
    const sql = 'select * from users where userName = ? and password = ?';
    return await db.query(sql, [userName, password]);
  },
  // 连接数据库根据用户名查询用户信息
  FindUserName: async (userName) => {
    const sql = 'select * from users where userName = ?';
    return await db.query(sql, [userName]);
  },
  // 连接数据库插入用户信息
  Register: async (userName, password) => {
    const sql = 'insert into users values(null,?,?,null)';
    return await db.query(sql, [userName, password]);
  }
}
1
2
3
4
5
6
7
8
9
10
11
12
13
14
15
16
17
18
19
2
3
4
5
6
7
8
9
10
11
12
13
14
15
16
17
18
19
# 校验用户信息规则函数
module.exports = {
  /**
   * 校验用户信息是否符合规则
   * @param {Object} ctx
   * @param {string} userName
   * @param {string} password
   * @return:
   */
  checkUserInfo: (ctx, userName = '', password = '') => {
    // userName = userName ? userName : '';
    // password = password ? password : '';
    // 判断是否为空
    if (userName.length === 0 || password.length === 0) {
      ctx.body = {
        code: '002',
        msg: '用户名或密码不能为空'
      }
      return false;
    }
    // 用户名校验规则
    const userNameRule = /^[a-zA-Z][a-zA-Z0-9_]{4,15}$/;
    if (!userNameRule.test(userName)) {
      ctx.body = {
        code: '003',
        msg: '用户名不合法(以字母开头,允许5-16字节,允许字母数字下划线)'
      }
      return false;
    }
    // 密码校验规则
    const passwordRule = /^[a-zA-Z]\w{5,17}$/;
    if (!passwordRule.test(password)) {
      ctx.body = {
        code: '003',
        msg: '密码不合法(以字母开头,长度在6~18之间,只能包含字母、数字和下划线)'
      }
      return false;
    }

    return true;
  },
  /**
   * 校验用户名是否符合规则
   * @param {type}
   * @return:
   */
  checkUserName: (ctx, userName = '') => {
    // 判断是否为空
    if (userName.length === 0) {
      ctx.body = {
        code: '002',
        msg: '用户名不能为空'
      }
      return false;
    }
    // 用户名校验规则
    const userNameRule = /^[a-zA-Z][a-zA-Z0-9_]{4,15}$/;
    if (!userNameRule.test(userName)) {
      ctx.body = {
        code: '003',
        msg: '用户名不合法(以字母开头,允许5-16字节,允许字母数字下划线)'
      }
      return false;
    }

    return true;
  }
}
1
2
3
4
5
6
7
8
9
10
11
12
13
14
15
16
17
18
19
20
21
22
23
24
25
26
27
28
29
30
31
32
33
34
35
36
37
38
39
40
41
42
43
44
45
46
47
48
49
50
51
52
53
54
55
56
57
58
59
60
61
62
63
64
65
66
67
2
3
4
5
6
7
8
9
10
11
12
13
14
15
16
17
18
19
20
21
22
23
24
25
26
27
28
29
30
31
32
33
34
35
36
37
38
39
40
41
42
43
44
45
46
47
48
49
50
51
52
53
54
55
56
57
58
59
60
61
62
63
64
65
66
67
# 测试
登录测试

注册测试

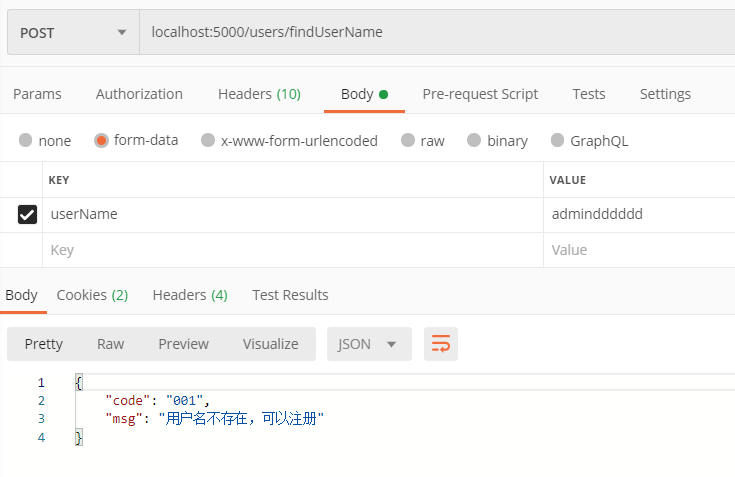
查找用户名测试

# 结语
- 一个node.js(Koa)后端服务器快速启动模板到这里已经搭建好了;
- 需要使用的时候只需要分模块的添加一些接口并实现,就可以快速的构建起来一个后端服务器;
- 后面还打算加一个文件上传(续传)模块;
- 如果你觉得还不错,可以右上角点Star支持一下哦;
- 笔者还在不断的学习中,如果有表述错误或设计错误,欢迎提意见。
- 感谢你的阅读!
笔者:hai-27
2020年3月15日